Hallo allemaal,
Hello everyone
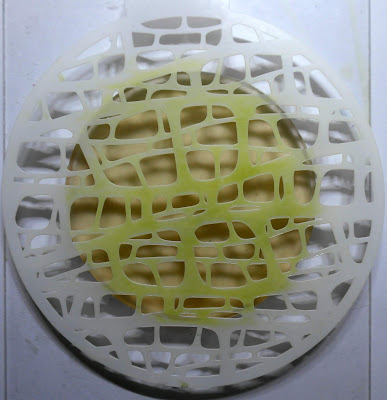
Pronty heeft veel stencils in het assortiment. Ik werk graag met een GelliPlate en stencils.
Vandaag laat ik jullie zien hoe ik dat doe.
Pronty has a lot of stencils in their product range. I love to work with a GelliPlate and stencils.
Today I want to show you how I do that.
Wat heb je nodig:
What do you need:
Ronde GelliPlate
Brayer
Stempelinkt
kleurtje distressinkt
Aquarelpotlood
Stencil: Gel Flower 400.803.040
waterpenseel
Round GelliPlate
Brayer
Stampink
A color distressink
Watercolorpencil
Stencil: Gel Flower 400.803.040
Waterbrush
Leg je GelliPlate op een stempelblok. Doe je inkt erop en rol met je brayer tot je een egale kleur hebt gekregen
Put your Gelliplate on a acryllicblock.
Put your Ink on it and roll this out with the brayer until you have a smooth color.
Leg je stencil op je GelliPlate en rol nog een paar keer met je brayer over het stencil.
Haal je stencil eraf.
Lay the stencil on the GelliPlate and roll a softly a few times over the stencil.
Then take the stencil of.
Pak nu je dubbele kaart en leg die plat en helemaal open op je craftsheet. Neem een papiertje en dek het stuk af (achterkant van je kaart) waar je de afdruk niet wilt hebben. Ik druk namelijk niet het hele rondje af.
Now take your double card and lay him flat on the crafsheet. Take a paper and put that over the part where you don't want to have a print. This because I print this time only a part of the GelliPlate.
Dan ziet je afdruk er zo uit.
The print looks like this.
Met een aquarelpotlood in bijpassende kleur, maak ik hier en daar wat accenten. Die werk ik uit met een vochtige waterpenseel.
With a watercolorpencil in a matching color you bring some accents on the print. Work the color out with the waterbrush.
Nu kan je de stempels gaan plaatsen.
Now you can place your stamps.
En natuurlijk ook een tekst.
Je kaart is klaar.
Veel succes met het maken van jullie eigen creatie. Laat hem zien op Facebook. Dat vinden we erg leuk.
And of course a quote.
The card is finished.
Good luck with making your own creations. Please show them on our FaceBookPage. We like to see them.


